
The Case Alerts page will display all results discovered from your automated Saved Searches within that Case. Anyone with access to the Case can review Alerts, create Findings, or delete Alerts.
Important: Alerts are retained for 90 days, so convert any you need to keep into a Finding.
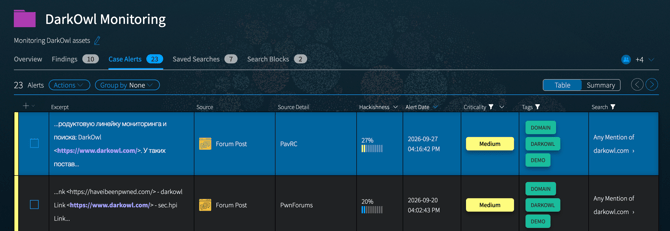
Saving an Alert as a Finding
Click on any Case Alert in the table to open it for review. When an Alert is open, it includes options to Add to Case Findings, Download, or Delete.
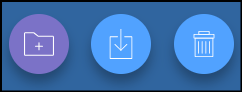
Clicking on Add to Case Findings will copy the result into the Findings sections of the current Case. Once alerts are reviewed and no longer needed, you can delete them from your result set.
Filtering and Grouping Alerts
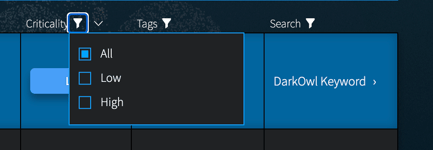
In the main display Alerts are sorted by date. You can use the Filter menus on the top of the columns to show a subset of Alerts. You can Filter by Category, by Criticality, or by Search Name by clicking on the icon and then selecting an option.
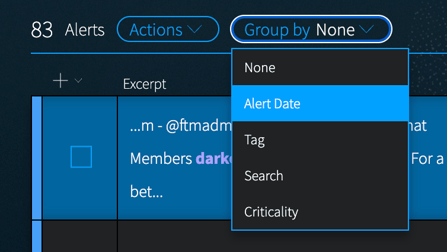
You can also use the Group by drop-down to organize your Alerts into sections. Grouping changes how alerts are displayed. It doesn't change, remove, or re-rank any alert. Each group row shows the group name and its alert count. It also shows a summary of information within that group: a criticality breakdown (Critical, High, Medium, and Low counts), number of tags, number of searches.
Select the arrow at the left of a group row to open that section, and review the alerts inside the group as you would in the standard list.
How to group your alerts
- Open a case and select the Case Alerts tab.
- Select the Group by menu above the alert list.
- Choose a grouping:
- None. The standard ungrouped list.
- Alert Date. Alerts grouped by when they arrived: Today, Earlier this week, Last week, and Older.
- Tag. Alerts grouped by the tags applied to them.
- Search. Alerts grouped by the saved search that produced them.
- Criticality. Alerts grouped by Critical, High, Medium, and Low.
To return to the full list, set Group by to None.
Ways to use each grouping
- Alert Date. Start each day with Today, then check that nothing critical is sitting in Older.
- Search. See which searches produce the most alerts, and which produce the most critical ones. This can help you tune noisy searches.
- Criticality. Clear Critical and High alerts first.
- Tag. Review alerts by the topic or workstream you tagged them for.
Bulk Actions for Alerts
The Actions menu provides options that can be applied to multiple alert selections, including:
- Move to Findings (current case): Check the box in the Alert list next to one or more alerts you want to preserve as Findings in the current case. Then use the Actions drop-down list to Move to Findings in this Case. The selected items will be added to the Findings section, and removed from the current Case Alerts list.
- Add to Findings (another case): Check the box in the Alert list next to one or more alerts you want to preserve as Findings in another case. Then use the Actions drop-down list to Add to Findings in another Case. This will open a modal in which you can select other case(s). The selected items will be added to the Findings section of the chosen case(s). They will not be removed from the current Case Alerts list until you delete them.
- Delete Selected alerts (one or more): Check the box in the Alert list next to the alerts you want to delete. Then use the Actions drop-down list and choose Delete selected.
- Delete Unselected alerts (one or more): Check the box in the Alert list next to the alerts you want to delete. Then use the Actions drop-down list and choose Delete unselected.
- Delete All alerts: Click the Actions drop-down list and choose Delete all alerts, and then confirming on the modal.

Note: You may experience a browser delay when deleting multiple alerts, or alerts that are large in size.